Initial Server Setup on Ubuntu 24.04: 10 Steps for Your VPS’s First 30 Minutes
Web Hosting & Servers 12 min read By Xavio Thomas
In this articleTable of contents16
Last updated: 10 October 2026
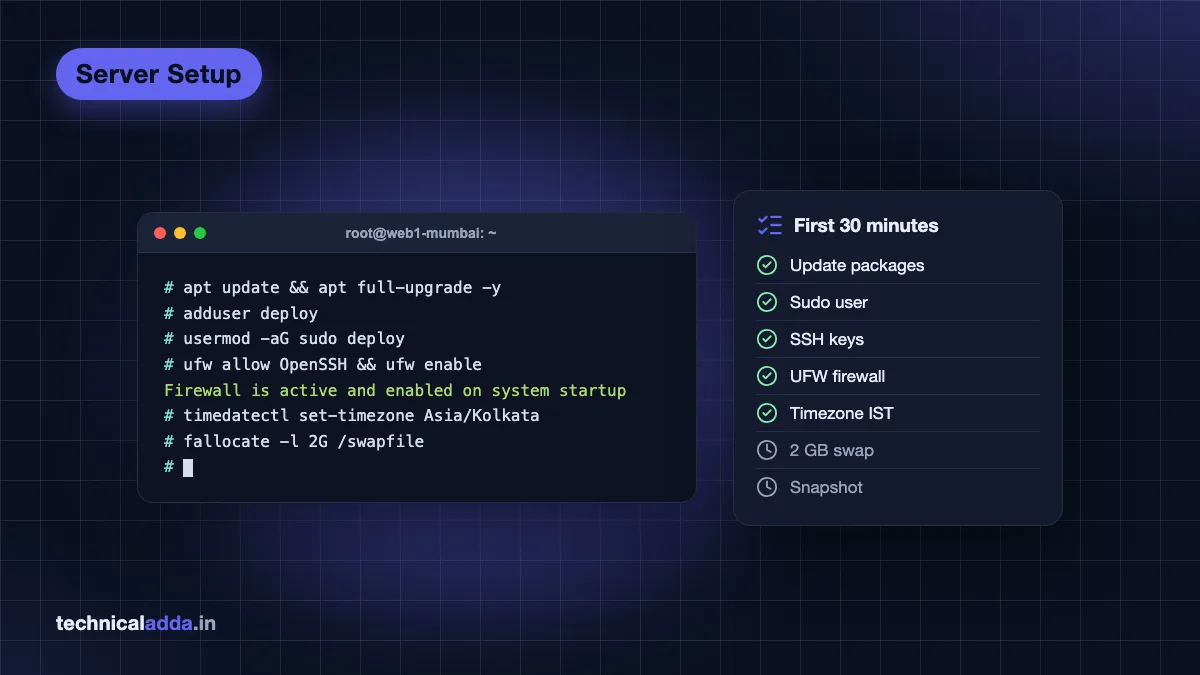
You have just bought a VPS, the provider has emailed an IP address and a root password, and you are staring at a blank terminal. What now? This initial server setup Ubuntu guide walks you through the first 30 minutes on a fresh Ubuntu 24.04 LTS server, in the right order: logging in, updating packages, creating a sudo user, setting up SSH keys, turning on the UFW firewall, setting the timezone to Asia/Kolkata, choosing a hostname, adding swap and confirming time sync. Each command comes with a one-line explanation, and it works the same on Hostinger, Contabo, DigitalOcean, AWS, Oracle Cloud or any other provider.
Quick answer: For initial server setup on Ubuntu 24.04, log in as root, run apt update and upgrade, create a user and add it to the sudo group, copy your SSH key to that user, allow OpenSSH in UFW and enable the firewall, set the timezone with timedatectl, set a hostname, add a swap file if RAM is small, and confirm NTP sync.
What you need before you start
- A VPS running Ubuntu 24.04 LTS (choose it in your provider's OS menu; reinstall if needed).
- The server's public IP address.
- The root password or an SSH key you added while creating the server. AWS and Oracle Cloud use a key and a default user (
ubuntu) instead of root. - A terminal on your device:
- Windows 10/11: PowerShell or Windows Terminal (OpenSSH is built in), or PuTTY.
- Mac: Terminal.
- Android: Termux (install
opensshwithpkg install openssh).
New to SSH? Our how to connect to a VPS using SSH guide covers every device in detail. Still choosing a server? Compare options in best VPS hosting in India.
Initial server setup Ubuntu 24.04 checklist
| Step | Task | Main command | Why it matters |
|---|---|---|---|
| 1 | Log in | ssh root@IP |
Access the server |
| 2 | Update | apt update && apt full-upgrade |
Install security fixes |
| 3 | Sudo user | adduser, usermod -aG sudo |
Stop using root daily |
| 4 | SSH keys | ssh-copy-id |
Passwordless, safer login |
| 5 | Firewall | ufw allow OpenSSH, ufw enable |
Block unwanted ports |
| 6 | Timezone | timedatectl set-timezone Asia/Kolkata |
Readable logs and cron times |
| 7 | Time sync | timedatectl status |
Correct clock for SSL, logs, 2FA |
| 8 | Hostname | hostnamectl set-hostname |
Identify the server |
| 9 | Swap | fallocate, mkswap, swapon |
Avoid out-of-memory crashes |
| 10 | Snapshot | Provider dashboard | Easy rollback point |
Step 1: Log in to your server
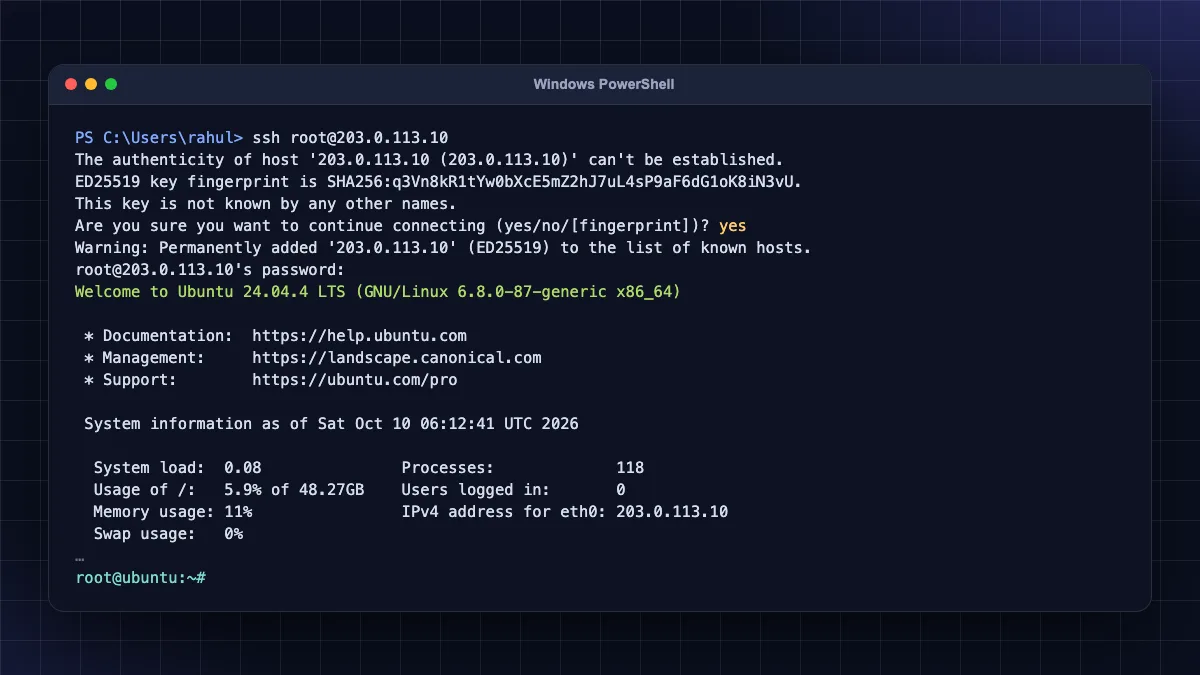
Open your terminal and connect as root (replace the IP with yours):
ssh [email protected]
This opens a secure shell session to the server as the root user.
The first time, you will see "The authenticity of host … can't be established" with a fingerprint. Type yes to save it. Then enter the root password from your provider's email (the cursor will not move while you type, which is normal).
On AWS or Oracle Cloud, use the key file and default user instead:
ssh -i ~/Downloads/my-key.pem [email protected]
This logs in with the downloaded private key as the ubuntu user. On Mac, Linux and Termux, run chmod 400 ~/Downloads/my-key.pem first so SSH accepts the key.
If you are logged in as ubuntu (not root), add sudo in front of the admin commands below. If the root password from your provider was weak or sent by email, change it now with passwd.
Step 2: Update all packages
Fresh images are often weeks or months old. Update before installing anything.
apt update
This downloads the latest list of available packages.
apt full-upgrade -y
This installs all updates, including ones that add or remove dependencies.
ls /var/run/reboot-required
If this file exists, a kernel or core library was updated and you should reboot.
reboot
This restarts the server; wait about a minute, then log in again with the same ssh command.
If you see a purple screen asking which services to restart or about a modified config file, press Enter to accept the defaults unless you know you changed that file.
Step 3: Create a sudo user
Working as root all the time is risky: one wrong command can wipe the system, and attackers target root first. Create a normal user with admin rights.
adduser deploy
This creates the user deploy (pick any lowercase name) with a home folder and asks you to set a password; other details can be left blank.
usermod -aG sudo deploy
This adds the user to the sudo group so it can run admin commands with sudo.
groups deploy
This confirms the user is now in the sudo group.
Use a strong, unique password. You will need it for sudo. A password manager makes this easy.
Step 4: Set up SSH keys for the new user
SSH keys replace passwords for logging in and are much harder to attack.
Option A: You already logged in as root with a key
Copy root's authorised key to the new user:
mkdir -p /home/deploy/.ssh
This creates the .ssh folder for the new user.
cp /root/.ssh/authorized_keys /home/deploy/.ssh/
This copies the public key(s) that already work for root.
chown -R deploy:deploy /home/deploy/.ssh && chmod 700 /home/deploy/.ssh && chmod 600 /home/deploy/.ssh/authorized_keys
This gives the user ownership and sets the strict permissions SSH requires.
Option B: You logged in with a password
On your own computer (not the server), create a key if you do not have one:
ssh-keygen -t ed25519 -C "[email protected]"
This creates an Ed25519 key pair in your .ssh folder; set a passphrase for extra safety.
Then copy it to the server. On Mac, Linux or Termux:
ssh-copy-id [email protected]
This adds your public key to the new user's authorized_keys file.
On Windows PowerShell:
type $env:USERPROFILE\.ssh\id_ed25519.pub | ssh [email protected] "mkdir -p ~/.ssh && chmod 700 ~/.ssh && cat >> ~/.ssh/authorized_keys && chmod 600 ~/.ssh/authorized_keys"
This does the same job as ssh-copy-id, which Windows does not include.
Test the new login
Keep your root session open. In a new terminal window:
ssh [email protected]
This should log you in with the key (asking only for your key passphrase, if any).
sudo whoami
This should print root, proving sudo works.
From now on, log in as this user. Disabling root and password login entirely is a hardening step covered in our how to secure a Linux VPS server guide. Do it once you are sure key login works.
Step 5: Enable the UFW firewall
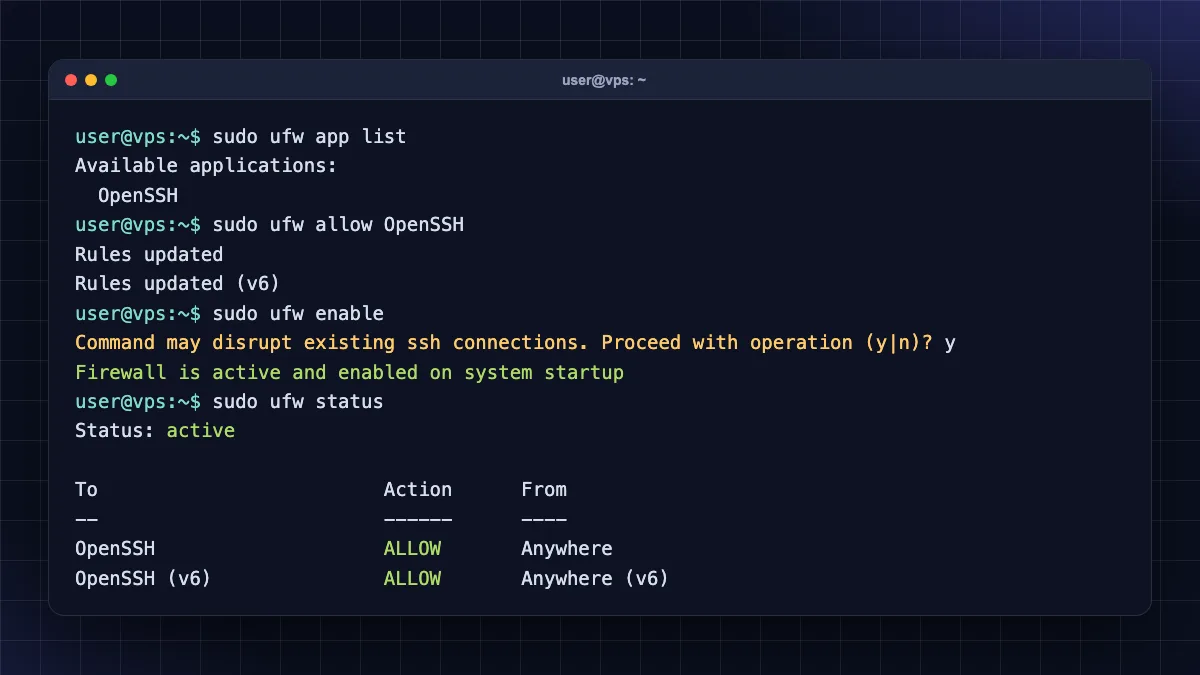
Ubuntu includes UFW (Uncomplicated Firewall), but it is off on most VPS images. Allow SSH before enabling it, or you will lock yourself out.
sudo ufw app list
This lists app profiles; you should see OpenSSH.
sudo ufw allow OpenSSH
This allows incoming SSH on port 22.
sudo ufw enable
This turns the firewall on and enables it at boot; type y to confirm.
sudo ufw status
This shows the active rules; OpenSSH should be listed as ALLOW.
When you install a web server later, add its profile, for example sudo ufw allow 'Nginx Full' for ports 80 and 443. See Ubuntu's firewall documentation (opens in new tab) for more rule examples. Also check your provider's cloud firewall (AWS Security Groups, Oracle Security Lists). Both layers must allow a port for it to work.
Step 6: Set the timezone to Asia/Kolkata
VPS images default to UTC. If you and your users are in India, setting IST makes logs, cron jobs and app timestamps easier to read.
timedatectl
This shows the current time, timezone and sync status.
sudo timedatectl set-timezone Asia/Kolkata
This switches the server to Indian Standard Time (UTC+5:30).
date
This confirms the new local time with "IST".
UTC or IST? Many teams keep servers on UTC so logs from different regions line up. For a single server serving Indian users, IST is simpler. Just be consistent and remember that cron schedules follow the server's timezone.
Step 7: Check time sync (NTP)
An accurate clock matters for SSL certificates, logs, two-factor codes and databases. Ubuntu 24.04 uses systemd-timesyncd by default (Ubuntu 25.10 and later switched to chrony), as described in Ubuntu's timedatectl and timesyncd guide (opens in new tab).
timedatectl status
Look for System clock synchronized: yes and NTP service: active.
sudo timedatectl set-ntp true
Run this only if NTP shows inactive; it turns on automatic time sync.
timedatectl timesync-status
This shows which NTP server is being used and the current offset.
To use specific NTP servers, add them to /etc/systemd/timesyncd.conf under NTP= and run sudo systemctl restart systemd-timesyncd. The defaults work fine for most people.
Step 8: Set the hostname
A clear hostname helps when you manage several servers (web1-mumbai, n8n-prod).
sudo hostnamectl set-hostname web1-mumbai
This sets the server's name permanently.
sudo nano /etc/hosts
Find the line starting with 127.0.1.1 and change the old name to web1-mumbai (add the line if missing), so sudo does not warn "unable to resolve host".
hostnamectl
This confirms the new static hostname.
cloud-init's update_hostname module runs at every boot, but by default (preserve_hostname: false) it stops touching the name once you have changed /etc/hostname yourself, according to the cloud-init module reference (opens in new tab). Some provider images still reset it from their metadata. If the name reverts after a reboot, set preserve_hostname: true in /etc/cloud/cloud.cfg (or in a new file such as /etc/cloud/cloud.cfg.d/99-hostname.cfg, which survives package upgrades). If your /etc/hosts edit disappears instead, the image has manage_etc_hosts: true, which rebuilds the file from a template in /etc/cloud/templates/ at every boot; make the change in that template or set manage_etc_hosts: false.
Step 9: Add swap space
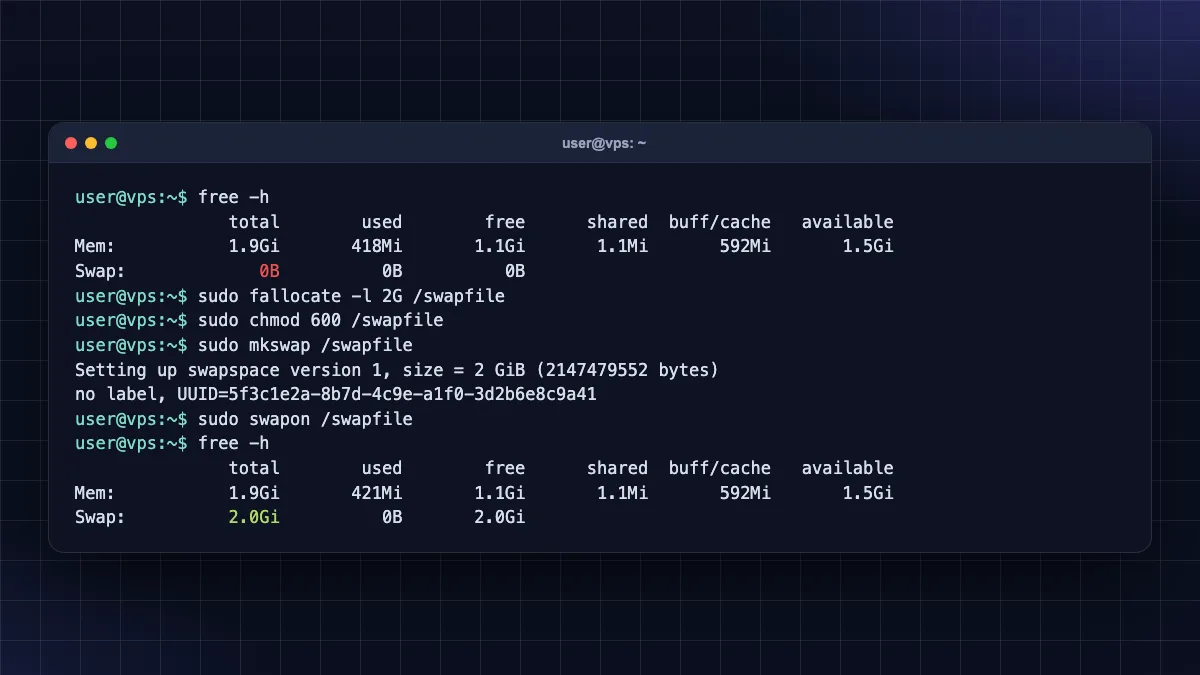
Swap is disk space used as overflow memory. It is slower than RAM but stops the system from killing your database or app when memory briefly runs out. It is most useful on 1 to 2 GB VPS plans.
free -h
This shows RAM and swap; if the Swap line shows 0B, continue.
sudo fallocate -l 2G /swapfile
This creates a 2 GB file for swap (use 1G on very small disks, up to 4G for 4 to 8 GB RAM).
sudo chmod 600 /swapfile
This makes the file readable only by root, which is required for security.
sudo mkswap /swapfile
This formats the file as swap space.
sudo swapon /swapfile
This turns the swap on immediately.
echo '/swapfile none swap sw 0 0' | sudo tee -a /etc/fstab
This makes swap turn on automatically after every reboot.
echo 'vm.swappiness=10' | sudo tee /etc/sysctl.d/99-swappiness.conf && sudo sysctl --system
This tells Linux to prefer RAM and use swap only when needed.
Run free -h again to confirm. Note: some container-based VPS plans (OpenVZ/LXC) do not allow swap, which is another reason to choose a KVM VPS.
Step 10: Final checks and snapshot
Run a quick review before you install your apps:
sudo apt install -y curl git htop unzip
This installs common tools most tutorials expect.
systemctl --failed
This lists any services that failed to start; ideally it shows 0 units.
df -h /
This shows disk usage of the main partition.
Then reboot once (sudo reboot), log back in as your new user, and confirm everything (swap, timezone, firewall) survived the restart. Finally, take a snapshot from your provider's dashboard. It gives you a clean, configured starting point you can roll back to.
What to do next
Your server is now set up properly. Next steps depend on what you want to run:
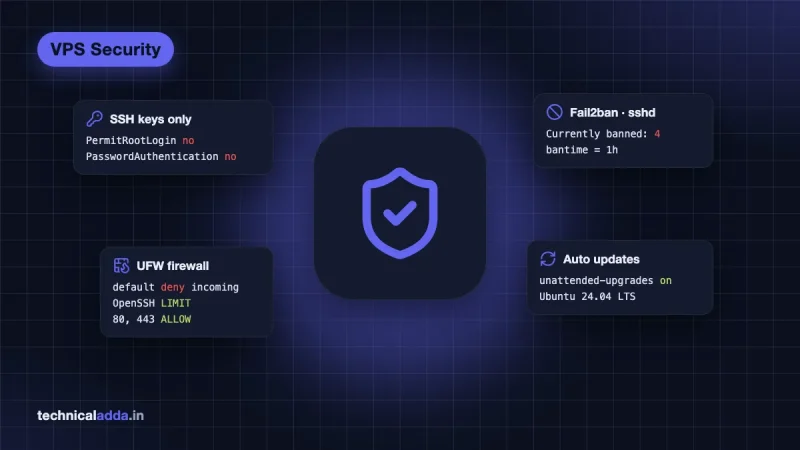
- Harden it further: disable root and password login, add Fail2ban, backups and monitoring (see our how to secure a Linux VPS server checklist).
- Host a website: follow install WordPress on VPS.
- Run automations: follow how to install n8n on VPS.
- Learn the terminal: keep our Linux commands for beginners PDF handy.
Need a server to practise on? if you want an easy panel and Indian billing (renewal prices are higher than the first term), or if you want more RAM per rupee and are comfortable doing everything in this guide yourself. If you only want to learn, a free cloud tier may be enough before you pay for anything.
Your first-30-minutes checklist in six lines
- Run
apt updateandapt full-upgradefirst, then create a non-root sudo user for daily work. - Set up SSH keys and test the new login in a second terminal before closing the root session.
- Allow OpenSSH in UFW before enabling the firewall to avoid lock-out.
- Set the timezone to Asia/Kolkata (or keep UTC everywhere) and confirm
System clock synchronized: yesin timedatectl. - Add a 1 to 2 GB swap file on 1 to 2 GB RAM plans, and set a hostname that tells you what the server does.
- Reboot once, check that swap, timezone and firewall survived, then take a provider snapshot.
Done with initial server setup on Ubuntu? Harden it next
Thirty minutes on these ten steps saves hours of trouble later: an updated system, a sudo user with SSH keys, a firewall that only allows SSH, the right timezone and time sync, a clear hostname and swap as a safety net. Do it the same way on every new VPS and take a snapshot when done. Your next step is hardening: follow our how to secure a Linux VPS server checklist, or browse more server guides in Web Hosting & Servers.
FAQ
Frequently Asked Questions
What is the first thing to do on a new Ubuntu server?
Log in over SSH and update all packages with "apt update" and "apt full-upgrade", then reboot if a kernel update was installed. After that, create a non-root sudo user, set up SSH key login and enable the UFW firewall with SSH allowed. These steps close the most common security gaps on a fresh VPS.
How do I create a sudo user in Ubuntu 24.04?
Run "adduser deploy" to create the user and set a password, then "usermod -aG sudo deploy" to add it to the sudo group. Check with "groups deploy". Log in as that user in a new terminal and run "sudo whoami"; if it prints root, sudo works. Replace deploy with any username you like.
How do I set the timezone to IST on Ubuntu server?
Run "sudo timedatectl set-timezone Asia/Kolkata" and then "date" or "timedatectl" to confirm. The server will show Indian Standard Time, UTC+5:30. Remember that cron jobs follow the server timezone, so schedules will now run in IST. Some teams keep servers on UTC for consistency across regions.
How do I enable the firewall on an Ubuntu VPS without getting locked out?
Always allow SSH first with "sudo ufw allow OpenSSH", then run "sudo ufw enable" and check with "sudo ufw status". If you changed the SSH port, allow that port number instead. Keep your current session open while testing, and use your provider's web console if you ever lose SSH access.
How much swap should I add on a VPS?
A simple rule: 1 to 2 GB of swap for VPS plans with 1 to 2 GB RAM, and 2 to 4 GB for 4 to 8 GB RAM. Swap is slower than RAM, so it is a safety net, not a substitute. Set vm.swappiness to 10 so Linux uses swap only when needed. If you constantly use swap, upgrade your RAM.
Is Ubuntu 24.04 good for a VPS?
Yes. Ubuntu 24.04 LTS is a long-term support release with standard security updates for five years, wide provider support and the most tutorials online. Most tools, including Nginx, Docker, WordPress stacks and n8n, have tested instructions for it. Choose the LTS version rather than interim releases for servers.
How do I check if time sync is working on Ubuntu?
Run "timedatectl status" and look for "System clock synchronized: yes" and "NTP service: active". On Ubuntu 24.04 the default sync service is systemd-timesyncd. If NTP is inactive, run "sudo timedatectl set-ntp true". "timedatectl timesync-status" shows which server is used and the clock offset.
How do I change the hostname on Ubuntu 24.04?
Run "sudo hostnamectl set-hostname newname", then edit /etc/hosts so the 127.0.1.1 line uses the new name. Confirm with "hostnamectl". If the name changes back after a reboot on a cloud server, set "preserve_hostname: true" in /etc/cloud/cloud.cfg so cloud-init does not overwrite it.
Should I disable root login during initial setup?
Yes, but only after your new sudo user can log in with an SSH key and run sudo. Test it in a separate terminal first. Then disable root login and password authentication in the SSH configuration and restart SSH. Our VPS security checklist explains the exact Ubuntu 24.04 settings and how to avoid cloud-init overriding them.
Can I do the initial server setup from my Android phone?
Yes. Install Termux from F-Droid or the project's GitHub releases (the Termux team no longer supports the Play Store build), run "pkg install openssh", and connect with "ssh root@your-server-ip". All commands in this guide work the same. Generating keys with ssh-keygen and copying them with ssh-copy-id also works in Termux. A Bluetooth keyboard makes long sessions easier.
Where to buy
-
Visit official site (opens in new tab)
Hostinger
-
Visit official site (opens in new tab)
Contabo